> ## Documentation Index
> Fetch the complete documentation index at: https://noradocs.solomontsao.com/llms.txt
> Use this file to discover all available pages before exploring further.
# Quickstart
# Get started with Nora: prove the operator loop on local Docker
> Install Nora with the local Docker target, launch the zero-key demo agent, and validate chat, logs, metrics, and a live terminal before connecting a paid model provider.
This guide takes you from a fresh machine to a running, validated agent runtime. On a Docker/Compose installation, the fastest evaluation uses Nora's built-in deterministic demo provider, so the first proof needs no external API key and creates no model bill. Kubernetes-only installations skip the one-click demo and start with a configured model provider. After the operator loop is clear, you can connect a real provider and deploy OpenClaw or Hermes for a live workload.
Evaluating the hosted reference deployment? Start at [Try Nora without an API
key](https://nora.solomontsao.com/signup?intent=demo). When that deployment has the local Docker
target enabled, the Getting Started page can enable the demo provider and deploy the demo agent in
one action.
The installer can install Docker, Docker Compose 2.24.4+, Git, and OpenSSL for you if they are not
already present on your machine. Standalone `docker-compose` v1 is unsupported. You need macOS
12+, Linux (Ubuntu 20.04+, Debian 11+, or Fedora 38+), or Windows 10+ with WSL2, plus admin or
sudo access.
Run the one-line installer for your platform, or bring up the stack manually with Docker Compose if you prefer full control over the setup.
```bash macOS / Linux / WSL2 theme={null} theme={null}
curl -fsSL https://raw.githubusercontent.com/solomon2773/nora/master/setup.sh | bash
```
```powershell Windows (PowerShell) theme={null} theme={null}
iwr -useb https://raw.githubusercontent.com/solomon2773/nora/master/setup.ps1 | iex
```
The installer clones the repository, verifies Docker and Docker Compose, generates platform secrets, walks you through access mode, platform mode, runtime/backend choices, and optional bootstrap admin creation, then starts the full Nora stack.
If you prefer to configure things manually, clone the repo and bring up the stack yourself:
```bash theme={null} theme={null}
git clone https://github.com/solomon2773/nora.git
cd nora
cp .env.example .env
# Edit .env with your secrets. Replace both DEFAULT_ADMIN_* placeholders.
# A self-hosted install may blank both to claim the first admin through
# /signup; hosted PaaS requires explicit secure values. Then
# materialize the read-only Compose secret files and start the stack:
./setup.sh --update
```
When the installer or Docker Compose finishes, it prints the base URL it configured. Local mode uses `http://localhost:8080` by default, but the installer automatically offers another free web port such as `8081` if `8080` is already in use.
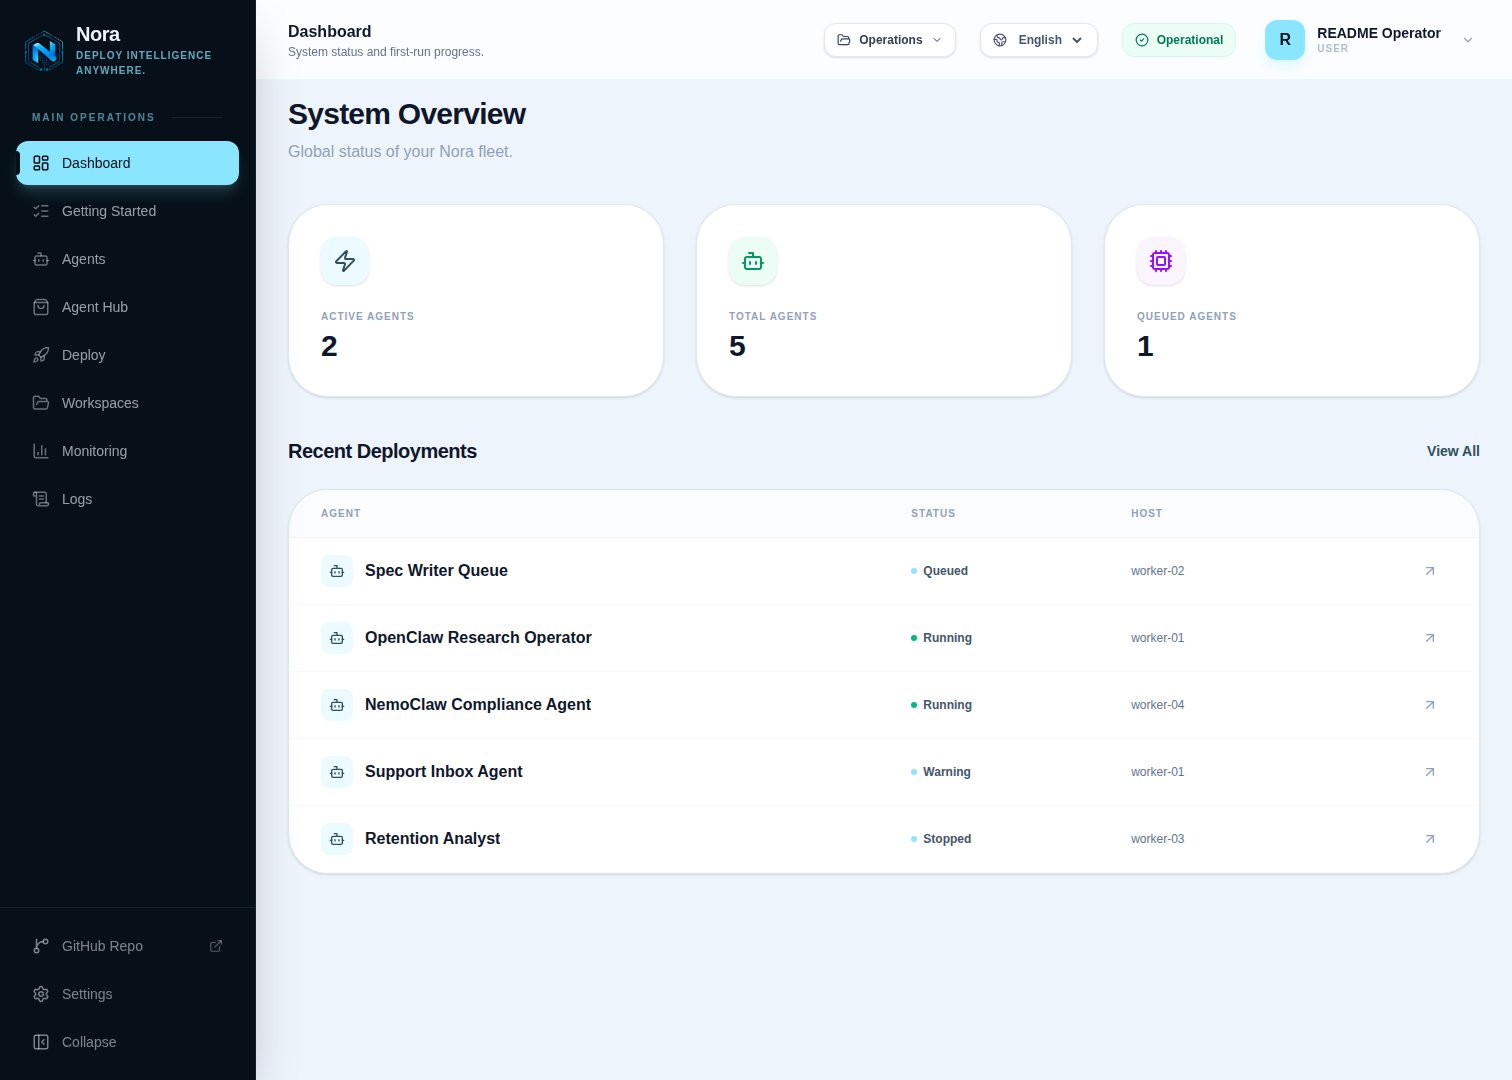
Navigate to the Nora dashboard in your browser. In local mode, use the URL printed by setup. The default URLs are:
| URL | What it opens |
| ------------------------------------- | -------------------------- |
| `http://localhost:8080` | Entry page |
| `http://localhost:8080/login` | Log in |
| `http://localhost:8080/signup` | Create an operator account |
| `http://localhost:8080/app/dashboard` | System overview |
| `http://localhost:8080/app/deploy` | Deploy your first agent |
If setup selected another port, replace `8080` with that port. If you configured a public domain during setup, the same paths apply on your origin — for example, `https://app.example.com/app/dashboard`.
 Go to the printed `/signup` URL and create your operator account. On a brand-new self-hosted
instance with no users yet, the signup page runs in first-run claim mode — it shows "Claim this
Nora server" and the first account you create becomes the platform admin. Hosted PaaS requires a
pre-seeded bootstrap administrator instead. After you finish, you land on the Getting Started page
(`/app/getting-started`).
If you set `DEFAULT_ADMIN_EMAIL` and `DEFAULT_ADMIN_PASSWORD` during setup, that account is already
created — go to `/login` and use those credentials instead.
When `/api/config/platform` reports `capabilities.localDockerDemo.enabled: true`, click **Launch local Docker demo — no API key** on **Getting Started**. Nora enables its built-in deterministic provider and deploys a demo agent in one action. If the page reports that the local Docker demo is unavailable, add a real provider and deploy to one of the targets enabled by your operator.
The demo proves Nora's deployment and operator workflow; it does not represent the quality of a production model. Use it to validate chat, logs, metrics, terminal access, and lifecycle controls without model spend.
For a live workload, open **Settings** and add an API key for a supported provider such as Anthropic, OpenAI, or Google. Nora encrypts provider keys at rest with AES-256-GCM and stores them centrally so you can sync them to running agents.
If you chose the demo path, the Getting Started action performs this step automatically and sends you to the new agent. Continue to **Validate the agent** below.
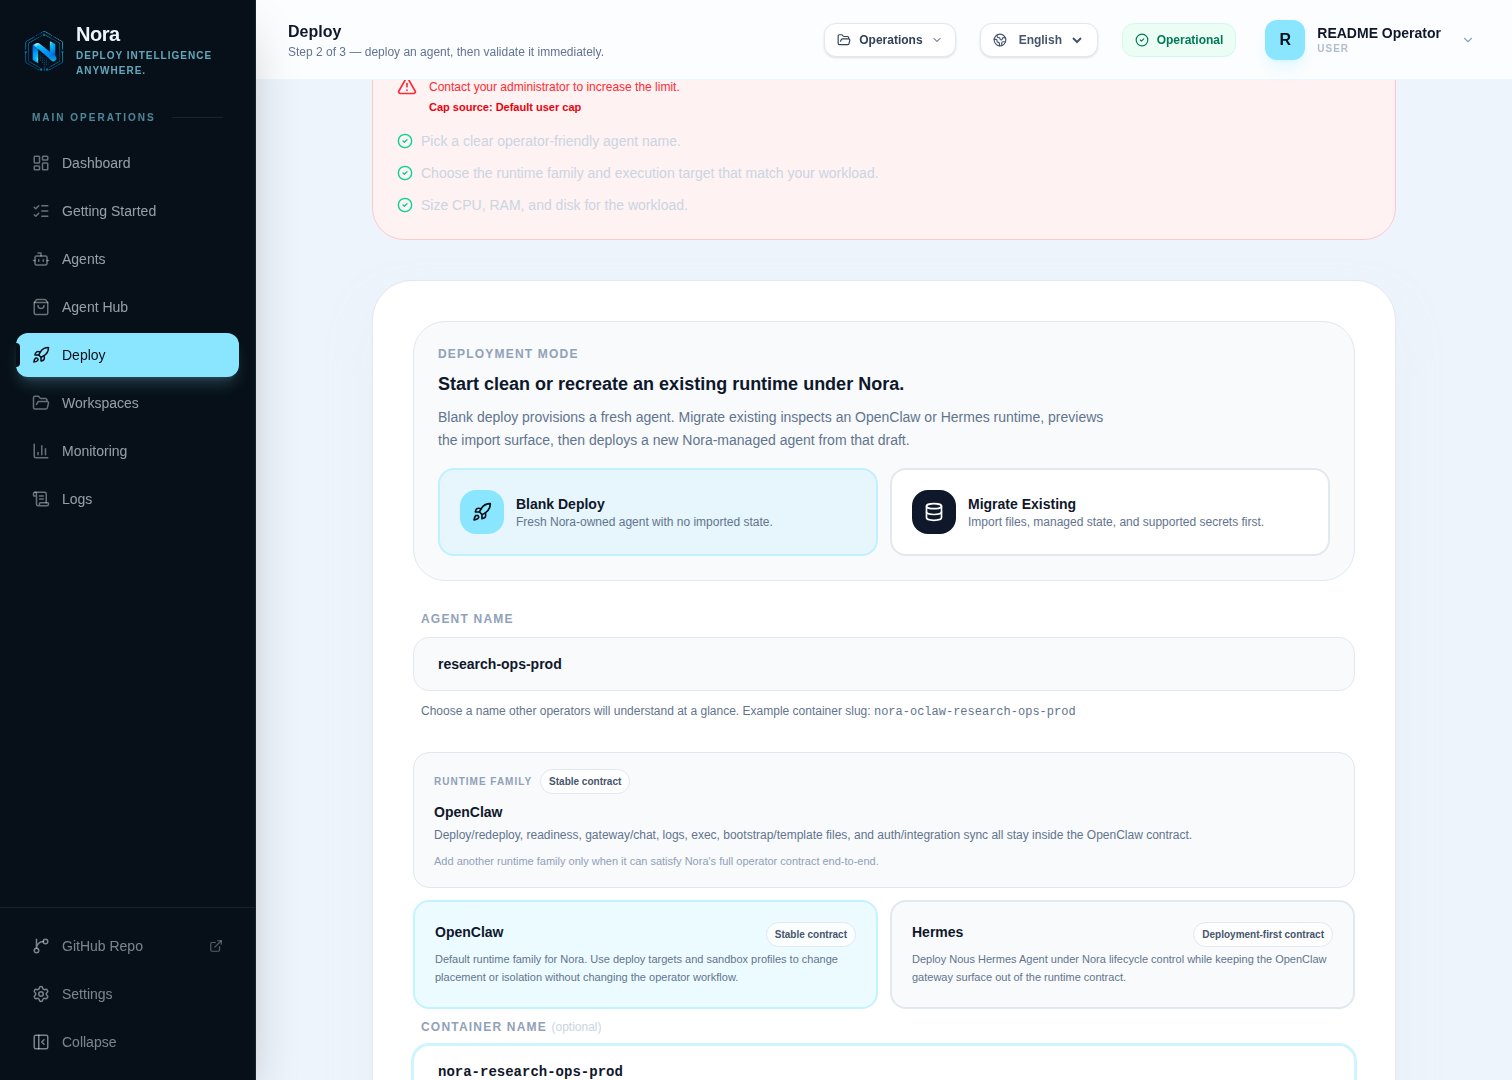
If you connected a real provider, go to **Deploy** and fill in the deployment form:
1. Enter an agent name
2. Choose the runtime family, execution target, and sandbox when the selected target offers one
3. Set CPU, RAM, and disk resource limits
4. For OpenClaw, click **Next: Choose Skills**, review the optional ClawHub skills, then click **Deploy Agent & Open Validation**
5. For runtime paths without the skills step, click **Deploy Agent**
Provisioning time depends on the selected runtime, target, image availability, and host capacity. Follow the live deployment state instead of assuming a fixed startup time.
Go to the printed `/signup` URL and create your operator account. On a brand-new self-hosted
instance with no users yet, the signup page runs in first-run claim mode — it shows "Claim this
Nora server" and the first account you create becomes the platform admin. Hosted PaaS requires a
pre-seeded bootstrap administrator instead. After you finish, you land on the Getting Started page
(`/app/getting-started`).
If you set `DEFAULT_ADMIN_EMAIL` and `DEFAULT_ADMIN_PASSWORD` during setup, that account is already
created — go to `/login` and use those credentials instead.
When `/api/config/platform` reports `capabilities.localDockerDemo.enabled: true`, click **Launch local Docker demo — no API key** on **Getting Started**. Nora enables its built-in deterministic provider and deploys a demo agent in one action. If the page reports that the local Docker demo is unavailable, add a real provider and deploy to one of the targets enabled by your operator.
The demo proves Nora's deployment and operator workflow; it does not represent the quality of a production model. Use it to validate chat, logs, metrics, terminal access, and lifecycle controls without model spend.
For a live workload, open **Settings** and add an API key for a supported provider such as Anthropic, OpenAI, or Google. Nora encrypts provider keys at rest with AES-256-GCM and stores them centrally so you can sync them to running agents.
If you chose the demo path, the Getting Started action performs this step automatically and sends you to the new agent. Continue to **Validate the agent** below.
If you connected a real provider, go to **Deploy** and fill in the deployment form:
1. Enter an agent name
2. Choose the runtime family, execution target, and sandbox when the selected target offers one
3. Set CPU, RAM, and disk resource limits
4. For OpenClaw, click **Next: Choose Skills**, review the optional ClawHub skills, then click **Deploy Agent & Open Validation**
5. For runtime paths without the skills step, click **Deploy Agent**
Provisioning time depends on the selected runtime, target, image availability, and host capacity. Follow the live deployment state instead of assuming a fixed startup time.
 OpenClaw is the best-supported runtime today and the recommended choice for your first deployment.
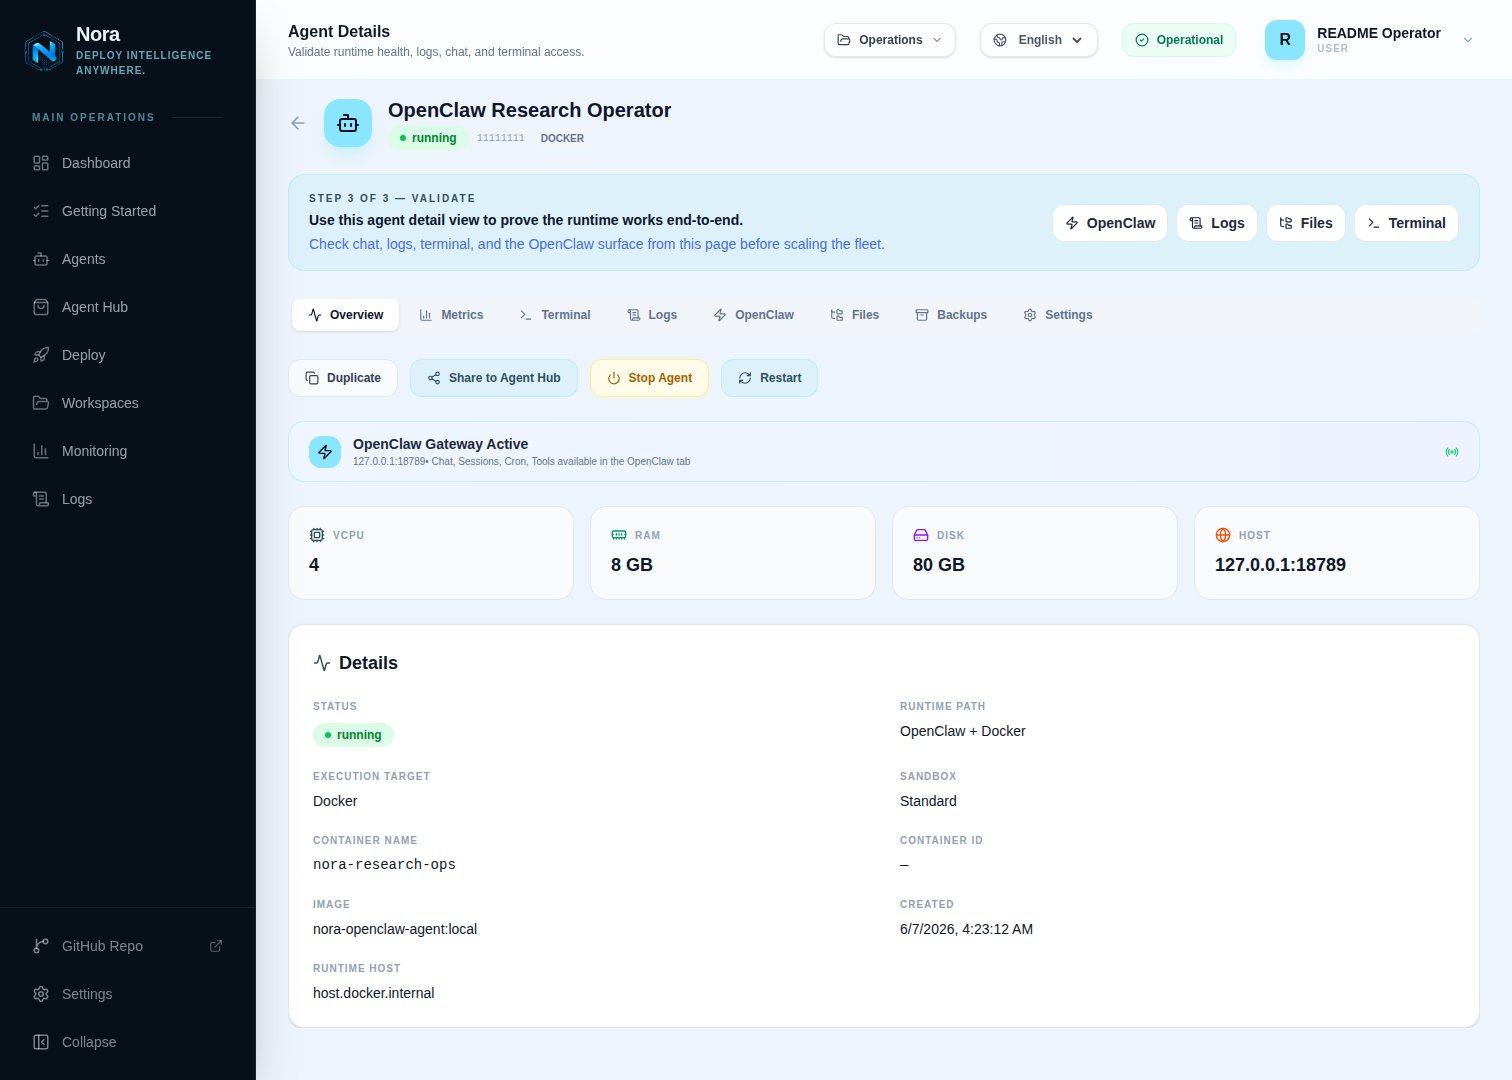
Open the agent detail page and work through the following checks:
1. Confirm the agent shows a **running** status
2. Click **Sync Keys** if you need to push your provider keys to the running runtime
3. Open **Chat** and send a test message to confirm the LLM connection is working
4. Click **Logs** and inspect the output to confirm the runtime is healthy
5. Open **Terminal** to confirm you have an interactive session
If all five checks pass, Nora has demonstrated its core value — a single surface for deploying, observing, and operating an agent runtime.
OpenClaw is the best-supported runtime today and the recommended choice for your first deployment.
Open the agent detail page and work through the following checks:
1. Confirm the agent shows a **running** status
2. Click **Sync Keys** if you need to push your provider keys to the running runtime
3. Open **Chat** and send a test message to confirm the LLM connection is working
4. Click **Logs** and inspect the output to confirm the runtime is healthy
5. Open **Terminal** to confirm you have an interactive session
If all five checks pass, Nora has demonstrated its core value — a single surface for deploying, observing, and operating an agent runtime.
 If this guide helped you get your first agent running, a star helps other operators discover Nora.
## What's next
Learn how to configure runtimes, resource limits, and deployment options in depth.
Add more providers, rotate keys, and control which agents have access to each key.
Connect a private Docker server, VPS, or cloud VM and validate the full remote deployment path.
Wire GitHub, Slack, Jira, AWS, and other tools to your running agents.
Track agent health, LLM usage, costs, and runtime activity in real time.
Find focused contribution areas, development commands, and the expected pull-request handoff.
Ask setup questions, share what you deployed, or align on a larger feature before building it.
If this guide helped you get your first agent running, a star helps other operators discover Nora.
## What's next
Learn how to configure runtimes, resource limits, and deployment options in depth.
Add more providers, rotate keys, and control which agents have access to each key.
Connect a private Docker server, VPS, or cloud VM and validate the full remote deployment path.
Wire GitHub, Slack, Jira, AWS, and other tools to your running agents.
Track agent health, LLM usage, costs, and runtime activity in real time.
Find focused contribution areas, development commands, and the expected pull-request handoff.
Ask setup questions, share what you deployed, or align on a larger feature before building it.