> ## Documentation Index
> Fetch the complete documentation index at: https://noradocs.solomontsao.com/llms.txt
> Use this file to discover all available pages before exploring further.
# Self hosting
# Self-host Nora on your own infrastructure
> Run Nora on your own infrastructure with the one-line installer or Docker Compose. Covers system requirements, install paths, and opening the dashboard.
Nora is self-hosted by design. You run the full stack — Nginx, Next.js frontends, Express API, PostgreSQL, and Redis — on infrastructure you control. This page covers system requirements, the two install paths, and how to reach the dashboard once the stack is running.
## System requirements
Before you install, make sure your host meets the following requirements.
| Requirement | Details |
| -------------------- | -------------------------------------------------------------------------------------- |
| **Operating system** | macOS 12+, Linux (Ubuntu 20.04+, Debian 11+, Fedora 38+), or Windows 10+ with WSL2 |
| **Permissions** | Admin or sudo access for initial setup |
| **Docker** | Docker Engine with Compose 2.24.4+ (the installer can install Docker if it is missing) |
| **Git** | Git (the installer can install Git if it is missing) |
| **OpenSSL** | OpenSSL (used to generate secrets; the installer can install it if missing) |
The setup script checks for Docker, Docker Compose 2.24.4 or newer, Git, and OpenSSL and installs
missing prerequisites before proceeding. Standalone `docker-compose` v1 is not supported because
Nora's hardened overlays use modern Compose merge tags.
## Recommended install
The installer script is the fastest path to a running Nora instance. It handles dependency checks, secret generation, access mode configuration, optional admin account creation, local port selection, and stack startup in one interactive pass.
Open a terminal and run the command for your platform.
```bash macOS / Linux / WSL2 theme={null} theme={null}
curl -fsSL https://raw.githubusercontent.com/solomon2773/nora/master/setup.sh | bash
```
```powershell Windows (PowerShell) theme={null} theme={null}
iwr -useb https://raw.githubusercontent.com/solomon2773/nora/master/setup.ps1 | iex
```
The installer walks you through each configuration decision in order:
1. Verify or install Docker, Docker Compose, Git, and OpenSSL
2. Clone the repository (if running via the curl pipe)
3. Generate or preserve secrets for JWTs, AES encryption, managed backups, Agent Hub keys, and the database
4. Choose platform mode: **self-hosted** (operator-defined resource limits) or **PaaS** (Stripe billing)
5. Choose whether to keep the GA **Docker** backend enabled and whether to opt into the experimental **Proxmox LXC** target. Kubernetes clusters are registered after setup in **Admin -> Kubernetes**. Proxmox stays disabled by default and requires secure API/SSH configuration plus the real-host smoke test.
6. Choose access mode: **local only** (`http://localhost:8080`), **public domain behind a proxy**, or **public domain with TLS at Nginx**
7. Optionally create a bootstrap admin account
8. Start the stack; after login, add your LLM provider key in **Settings**
When the installer finishes, it writes `.env` and starts the stack with `docker compose up -d`.
On macOS, Linux, and WSL the file is restricted to mode `0600`. On Windows, setup removes
inherited access and grants access only to the current user, SYSTEM, and local Administrators;
setup stops if it cannot secure the file.
In local mode, setup checks host ports before startup. If `8080` is busy, it offers a free web port such as `8081` and updates `NEXTAUTH_URL`. If `127.0.0.1:4100` is busy, it offers a free backend API port and writes `BACKEND_API_PORT`.
The installer prints the base URL it configured. For local mode, the default is:
```
http://localhost:8080
```
If setup selected a different port, use the printed URL instead. If you skipped the bootstrap admin account, go to `/signup` on that origin. On a fresh self-hosted instance the signup page runs in "claim this server" mode and the first account you create becomes the platform admin (see [Security architecture](/concepts/security)). Hosted PaaS cannot skip bootstrap-admin creation.
## Reconfigure vs clean reinstall
If you run setup again from an existing checkout, it asks which maintenance mode you want:
| Mode | What it preserves | When to use it |
| ----------------------- | -------------------------------------------------------------------------- | ------------------------------------------------------------------------------- |
| **Update code only** | `.env`, Docker volumes, and provisioned agents | Pull the latest Nora code without changing local configuration |
| **Reconfigure install** | Docker volumes and provisioned agents | Change limits, access mode, enabled runtimes, or ports while keeping local data |
| **Clean reinstall** | Nothing local; compose volumes and local Nora agent containers are removed | Start over with a brand-new local database |
Reconfigure mode intentionally preserves the existing `DB_PASSWORD` from `.env` because the
Postgres Docker volume is already initialized with that password. If you manually replace `.env`
with a different `DB_PASSWORD` while keeping volumes, the backend cannot sign up or log in users
until the password is restored or the volume is recreated.
## Manual setup
Use manual setup when you want full control over every configuration value before the stack starts.
```bash theme={null} theme={null}
git clone https://github.com/solomon2773/nora.git
cd nora
```
Running `bash setup.sh` from inside a cloned repo skips the clone step and takes you through the same interactive configuration flow as the one-line installer.
```bash theme={null} theme={null}
bash setup.sh
```
If you prefer to configure everything by hand, copy the example environment file instead and edit it directly:
```bash theme={null} theme={null}
cp .env.example .env
```
Once `.env` is configured, run the non-interactive update path once. It materializes the
gitignored Compose secret files, refreshes the hardened overlay, and starts all services:
```bash theme={null} theme={null}
./setup.sh --update
```
On Windows, use `pwsh -File .\setup.ps1 -Update`. After this first materialization, ordinary
`docker compose up -d` commands reuse the protected files.
Advanced Linux/macOS operators who intentionally bypass setup can run
`bash scripts/materialize-compose-secrets.sh .env` before `docker compose up -d`. Re-run the
helper whenever any of the six core values changes.
The production overlay materializes the core JWT, encryption, Agent Hub, backup, and database
credentials as read-only files under `/run/secrets` for backend and worker containers. Marketing
receives an explicit allowlist of only its runtime/OAuth values, not the complete deploy env.
Do not start the stack with placeholder values for `JWT_SECRET` or `ENCRYPTION_KEY`. Generate
each with `openssl rand -hex 32` before running the update command. Also replace both
`DEFAULT_ADMIN_EMAIL` and `DEFAULT_ADMIN_PASSWORD` placeholders with a secure bootstrap
account. A self-hosted install may blank both values to use first-account claim through
`/signup`; hosted PaaS requires both values before startup.
Once the stack is up, open your browser to `http://localhost:8080`. On self-hosted Nora, open `/signup` to create your operator account if you did not pre-seed a bootstrap admin. On a fresh database this runs as first-run claim, and the first account created becomes the platform admin. Hosted PaaS requires a pre-seeded administrator.
## Kubernetes (Helm)
Run Nora itself on a Kubernetes cluster with the public OCI chart at `oci://ghcr.io/solomon2773/nora`. Its source lives in [`infra/helm/nora`](https://github.com/solomon2773/nora/tree/master/infra/helm/nora). The chart deploys the full control plane (nginx edge, the three frontends, backend API, provisioner and backup workers) with in-chart PostgreSQL and Redis by default, or external data stores via values.
```bash theme={null}
helm install nora oci://ghcr.io/solomon2773/nora \
--namespace nora --create-namespace \
--set secrets.jwtSecret="$(openssl rand -hex 32)" \
--set secrets.encryptionKey="$(openssl rand -hex 32)" \
--set secrets.backupEncryptionKey="$(openssl rand -hex 32)" \
--set secrets.apiKeyHashSecret="$(openssl rand -hex 32)" \
--set secrets.agentHubApiKeyHashSecret="$(openssl rand -hex 32)" \
--set secrets.dbPassword="$(openssl rand -hex 24)"
kubectl -n nora port-forward svc/nora-nginx 8080:80
```
This resolves the latest published chart. For a reproducible production install, run `helm show
chart oci://ghcr.io/solomon2773/nora`, record its `version`, and pass that value with `--version`.
The chart refuses to install without real secrets — there are no insecure defaults. New installs
also require distinct workspace/API and Agent Hub hash secrets; older upgrades retain their shared
hash-key fallback until you provide the dedicated Agent Hub value. The selected
Secret is mounted at `/run/secrets` only in control-plane and PostgreSQL pods; frontend pods do not
inherit it. For a public deployment set `publicUrl`, enable `ingress.*`, and terminate TLS at your
Ingress controller.
A cluster-hosted control plane cannot use the **local Docker** target (`ENABLED_BACKENDS=k8s`)
because its pods have no Docker socket. It can still use operator-registered [Remote
Docker](/configuration/provisioner-backends/remote-docker) targets over SSH when Nora is
self-hosted and the control-plane pods can reach the private remote-host network. Register agent
clusters under Admin → Kubernetes and mount their kubeconfigs with `kubeconfigs.existingSecret`.
In-place release upgrades from the Admin UI are a Docker Compose feature — use the Helm upgrade
command from the chart README instead.
See the [chart README](https://github.com/solomon2773/nora/blob/master/infra/helm/nora/README.md) for all values, design notes, and the local Kind smoke test.
## Accessing the dashboard
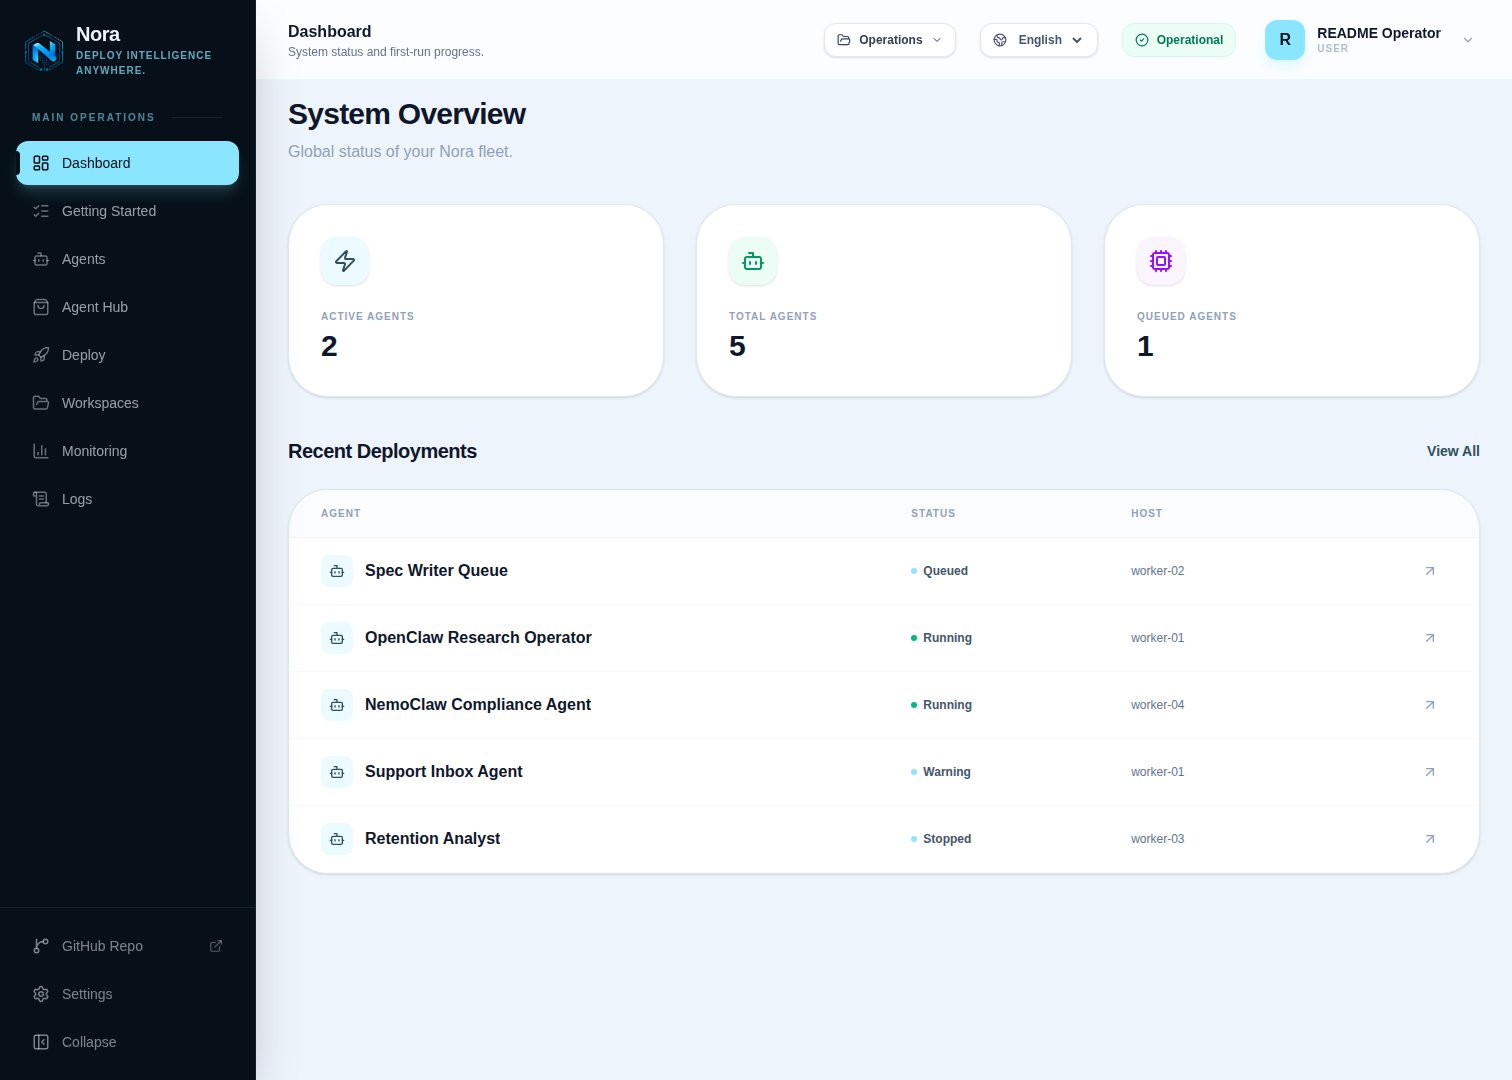
After installation, the following URLs are available in local mode. Public-domain mode uses the same paths on your configured origin.
| URL | What it opens |
| ------------------------------------- | -------------------------------- |
| `http://localhost:8080` | Marketing and entry page |
| `http://localhost:8080/login` | Log in to your operator account |
| `http://localhost:8080/signup` | Create a new operator account |
| `http://localhost:8080/app/dashboard` | System overview and agent status |
| `http://localhost:8080/app/deploy` | Deploy your first agent runtime |
If you configured a public domain (for example `https://app.example.com`), replace
`http://localhost:8080` with your domain in all of the paths above.
 ## What happens next
Once you can reach the dashboard, the next steps are:
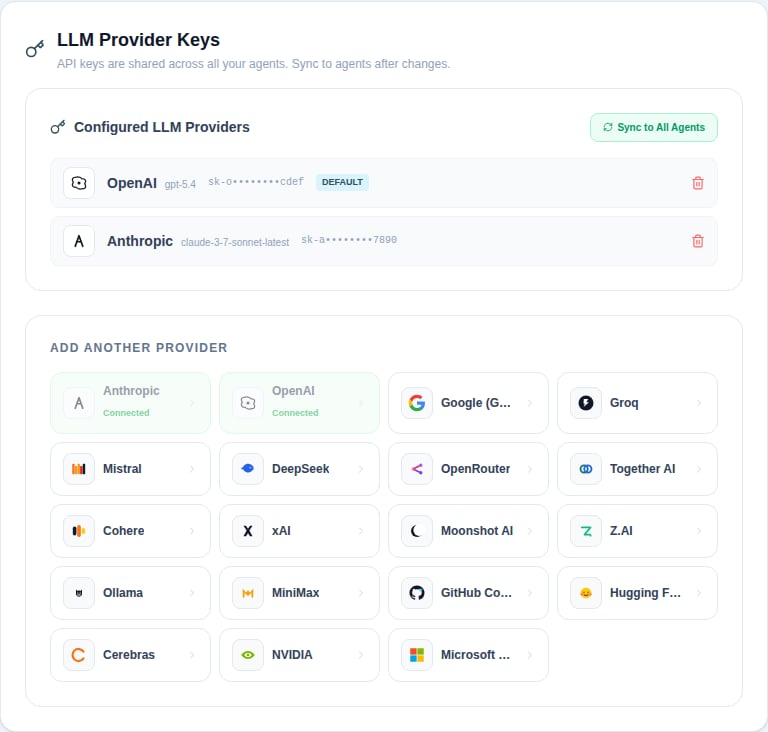
1. Go to **Settings** and add an LLM provider key (Anthropic, OpenAI, Google, or another supported provider).
2. Go to **Deploy**, name your agent, choose a runtime mode, set resource limits, and click **Confirm & Deploy Agent**.
3. Open the agent detail page to verify it is running, test **Chat**, inspect **Logs**, and open **Terminal**.
## What happens next
Once you can reach the dashboard, the next steps are:
1. Go to **Settings** and add an LLM provider key (Anthropic, OpenAI, Google, or another supported provider).
2. Go to **Deploy**, name your agent, choose a runtime mode, set resource limits, and click **Confirm & Deploy Agent**.
3. Open the agent detail page to verify it is running, test **Chat**, inspect **Logs**, and open **Terminal**.
 See the [quick start](/quickstart) for a full walkthrough of the first 15 minutes with Nora.
To keep the Nora control plane on this installation while running agents on another private Docker
server or VM, follow [Connect a Remote Docker host](/guides/remote-docker). The walkthrough covers
SSH registration, host-key pinning, firewall boundaries, deployment validation, and safe retirement.
## Useful Docker Compose commands
```bash theme={null} theme={null}
# Start all services in the background
docker compose up -d
# Stream logs from the backend API
docker compose logs -f backend-api
# Rebuild and restart a single service after a change
docker compose up -d --build backend-api
# Stop everything
docker compose down
```
See the [quick start](/quickstart) for a full walkthrough of the first 15 minutes with Nora.
To keep the Nora control plane on this installation while running agents on another private Docker
server or VM, follow [Connect a Remote Docker host](/guides/remote-docker). The walkthrough covers
SSH registration, host-key pinning, firewall boundaries, deployment validation, and safe retirement.
## Useful Docker Compose commands
```bash theme={null} theme={null}
# Start all services in the background
docker compose up -d
# Stream logs from the backend API
docker compose logs -f backend-api
# Rebuild and restart a single service after a change
docker compose up -d --build backend-api
# Stop everything
docker compose down
```