Organize agents with workspaces
Learn how Nora workspaces let you group and organize agents by project, team, or environment, and how to create, populate, and delete them.A workspace in Nora is a named group that lets you organize and share agents with a team. Instead of managing a flat list of agents, you can create workspaces to reflect the structure of your projects, teams, or deployment environments, invite teammates, and add the relevant agents to each one. Workspaces do not move agents between runtimes, but they do grant team access to assigned agents according to each member’s workspace role.
Creating a workspace
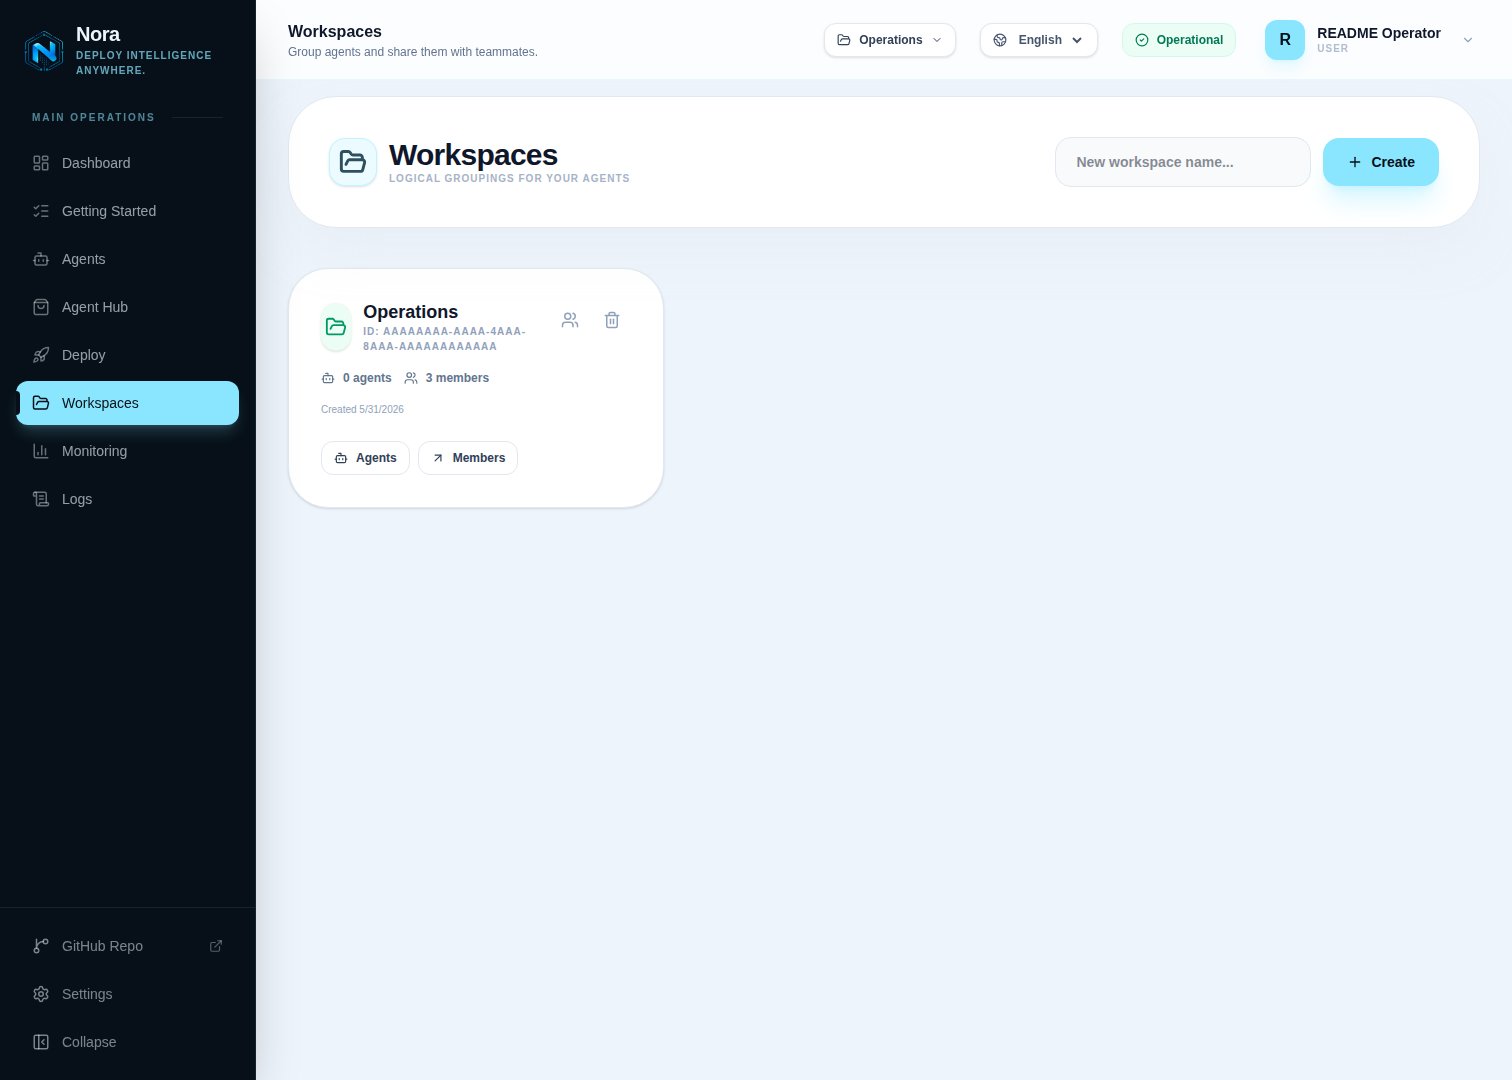
You can create a workspace from the dashboard at any time. Workspace names must be between 1 and 100 characters.Create a new workspace
Click New workspace, enter a descriptive name, and confirm. The workspace appears immediately in your list.
Adding agents to a workspace
Once a workspace exists, users witheditor, admin, or owner access can add agents they directly own to it. An agent can belong to more than one workspace, which is useful when a single agent is relevant to multiple projects or teams.
You can only add agents that you own. Once assigned, workspace members can see and operate the shared agent according to their workspace role. Only the direct agent owner can delete the underlying runtime and Nora record.
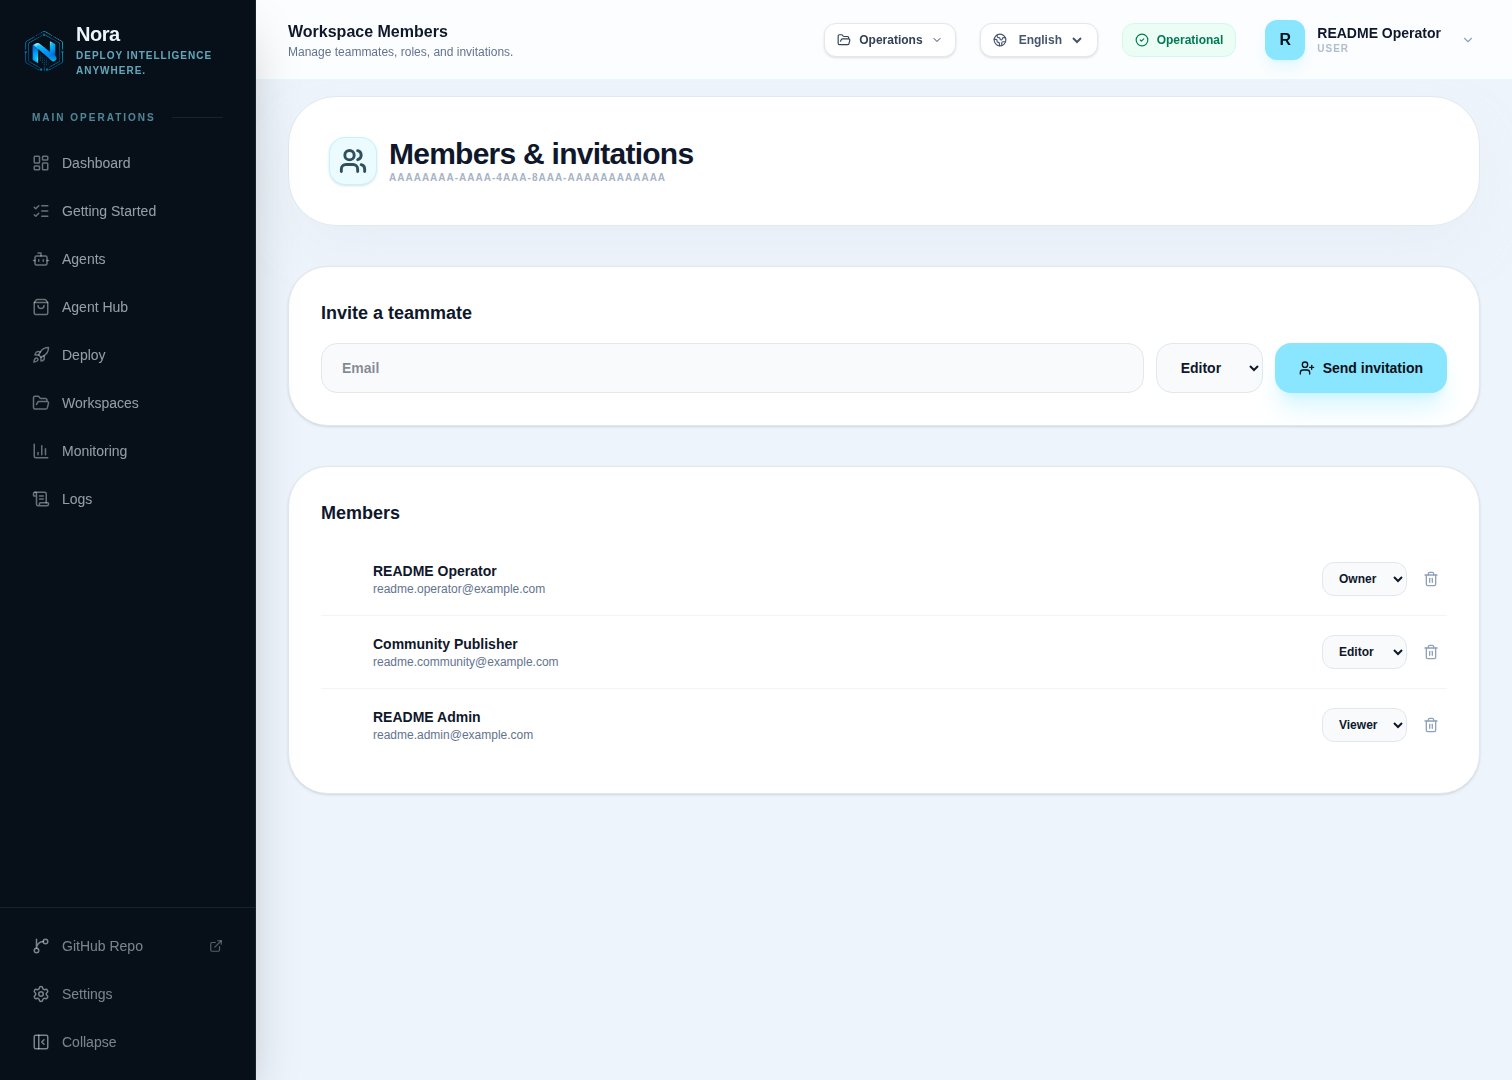
Sharing with teammates
Workspace roles apply to assigned agents:| Role | Agent access |
|---|---|
viewer | View assigned agents, cost, metrics, logs, and details. |
editor | Operate and edit assigned agents, and add directly owned agents to the workspace. |
admin | Manage members, invitations, budgets, alert rules, API keys, and remove agent assignments. |
owner | Full workspace control, including deleting the workspace. |
Workspace use cases
Workspaces are flexible — there is no single right way to structure them. Here are three common patterns:Group by project
Group by project
Create one workspace per project or product area. Add all agents that belong to that project — for example, a research agent, a summarization agent, and a code-review agent — to the same workspace so your team can find and manage them together.
Group by team
Group by team
Create a workspace for each team in your organization. Each team’s members can see and manage only the agents relevant to their work, reducing noise from unrelated deployments.
Group by environment
Group by environment
Create workspaces for
development, staging, and production. This makes it easy to see which agents are live in each environment and avoids accidental changes to production agents.Deleting a workspace
Deleting a workspace removes the workspace and all its agent memberships. It does not delete the agents themselves — they remain in your agent list and can be added to other workspaces.Related concepts
Agents
Learn about agent lifecycle, statuses, and resources.
LLM providers
Manage provider API keys and sync them to agents.