Get started with Nora: deploy your first agent in 15 minutes
Install Nora, open the dashboard, add an LLM provider key, deploy your first agent runtime, and validate it with chat, logs, and a live terminal.This guide takes you from a fresh machine to a running, validated agent runtime. You will install Nora using the one-line installer or Docker Compose, create your operator account, connect an LLM provider, deploy your first agent, and confirm the end-to-end workflow is healthy — all in about 15 minutes.
The installer can install Docker, Docker Compose, and Git for you if they are not already present
on your machine. You need macOS 12+, Linux (Ubuntu 20.04+, Debian 11+, or Fedora 38+), or Windows
10+ with WSL2, plus admin or sudo access.
Install Nora
Run the one-line installer for your platform, or bring up the stack manually with Docker Compose if you prefer full control over the setup.The installer clones the repository, verifies Docker and Docker Compose, generates platform secrets, walks you through access mode, platform mode, runtime/backend choices, and optional bootstrap admin creation, then starts the full Nora stack.If you prefer to configure things manually, clone the repo and bring up the stack yourself:When the installer or Docker Compose finishes, it prints the base URL it configured. Local mode uses
http://localhost:8080 by default, but the installer automatically offers another free web port such as 8081 if 8080 is already in use.Open the dashboard
Navigate to the Nora dashboard in your browser. In local mode, use the URL printed by setup. The default URLs are:
If setup selected another port, replace 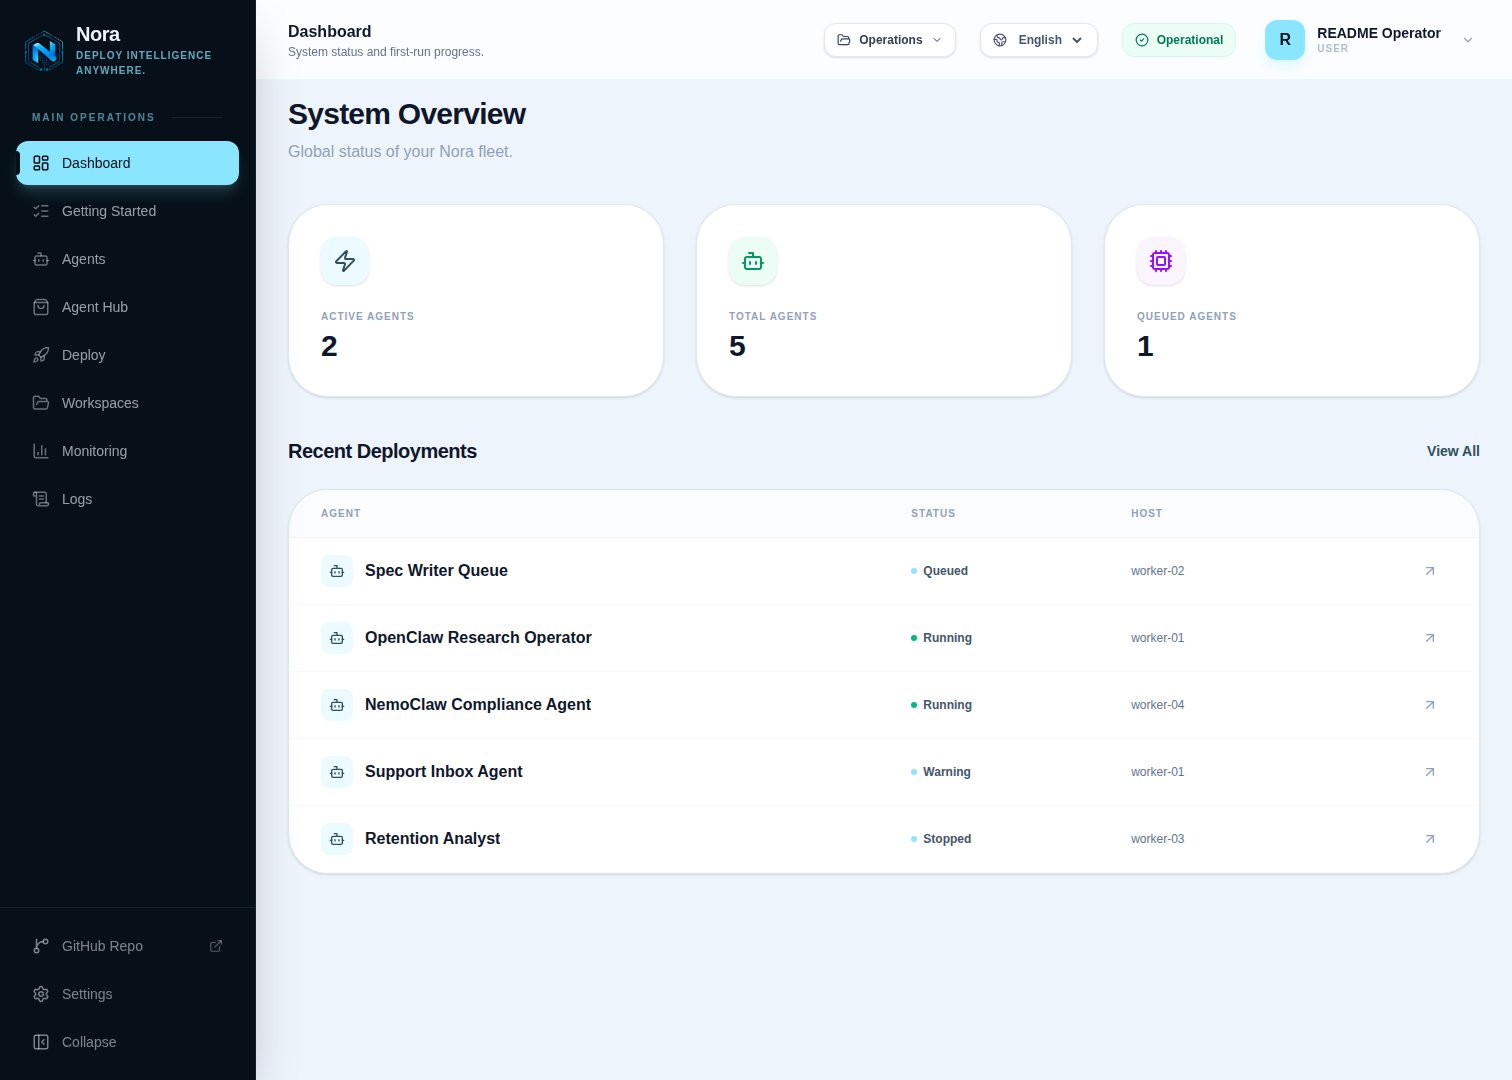
| URL | What it opens |
|---|---|
http://localhost:8080 | Entry page |
http://localhost:8080/login | Log in |
http://localhost:8080/signup | Create an operator account |
http://localhost:8080/app/dashboard | System overview |
http://localhost:8080/app/deploy | Deploy your first agent |
8080 with that port. If you configured a public domain during setup, the same paths apply on your origin — for example, https://app.example.com/app/dashboard.Create an account or log in
Go to the printed
/signup URL and create your operator account. If you set DEFAULT_ADMIN_EMAIL
and DEFAULT_ADMIN_PASSWORD during setup, that account is already created — go to /login and
use those credentials instead.Add an LLM provider key
Open Settings in the dashboard. Add an API key for a supported provider such as Anthropic, OpenAI, or Google. Nora encrypts provider keys at rest with AES-256-GCM and stores them centrally so you can sync them to any running agent at any time.
Deploy your first agent
Go to Deploy and fill in the deployment form: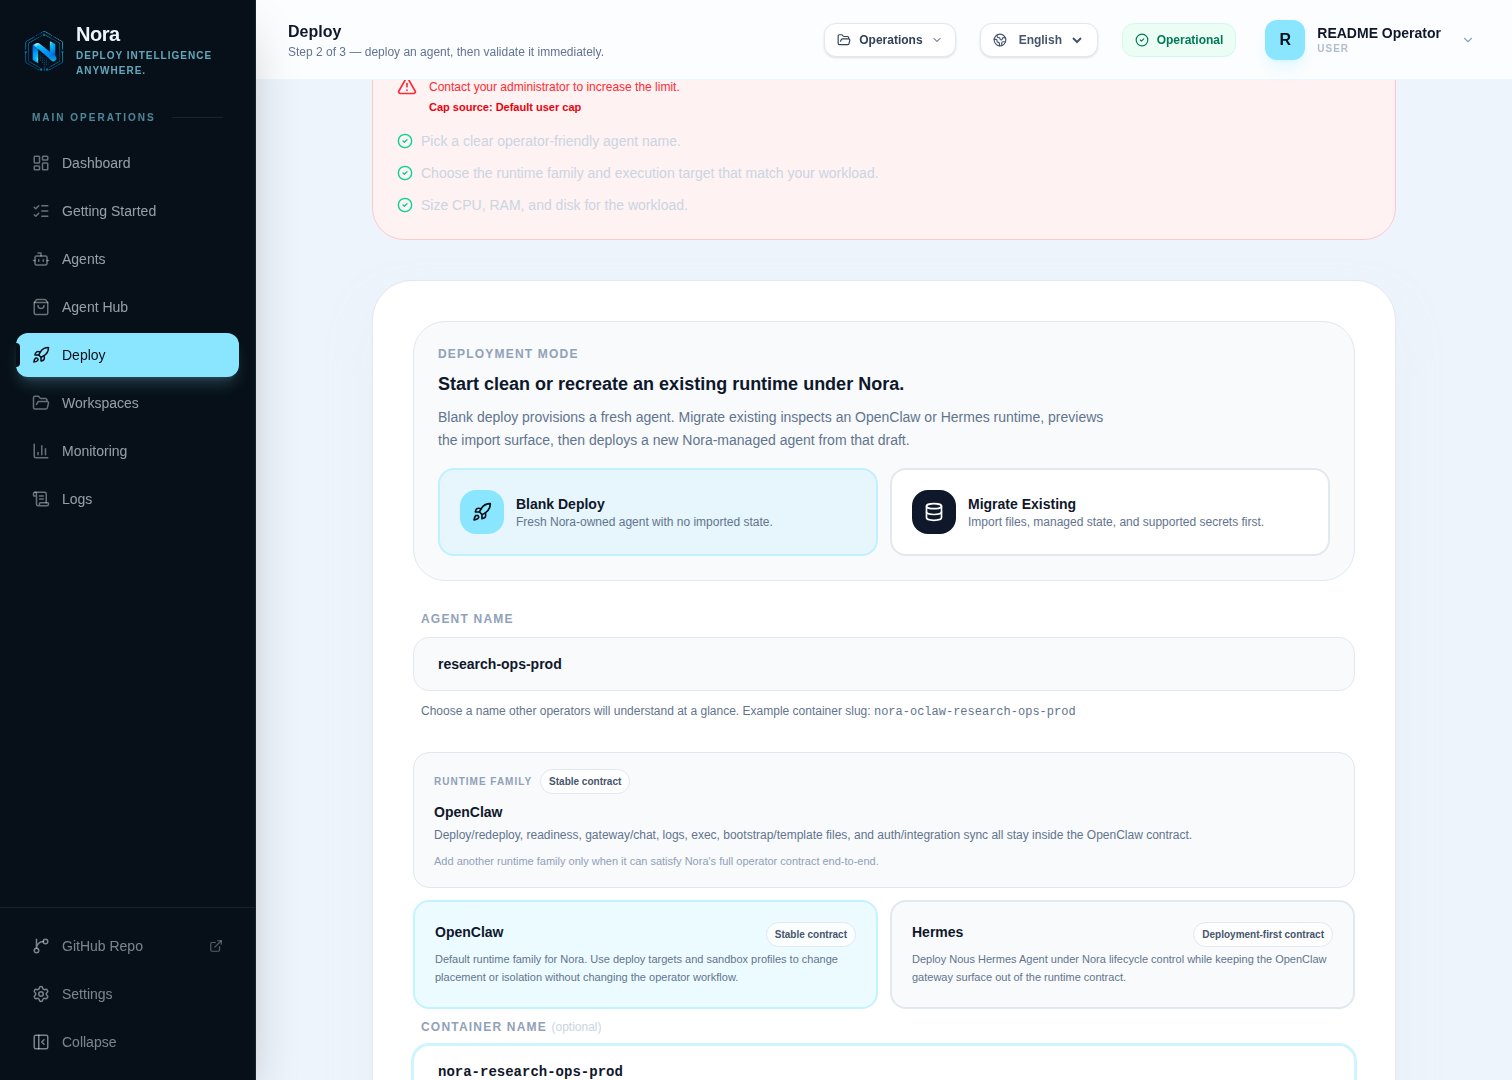
- Enter an agent name
- Choose a runtime mode
- Set CPU, RAM, and disk resource limits
- Click Confirm & Deploy Agent
OpenClaw is the best-supported runtime today and the recommended choice for your first deployment.
Validate the agent
Open the agent detail page and work through the following checks: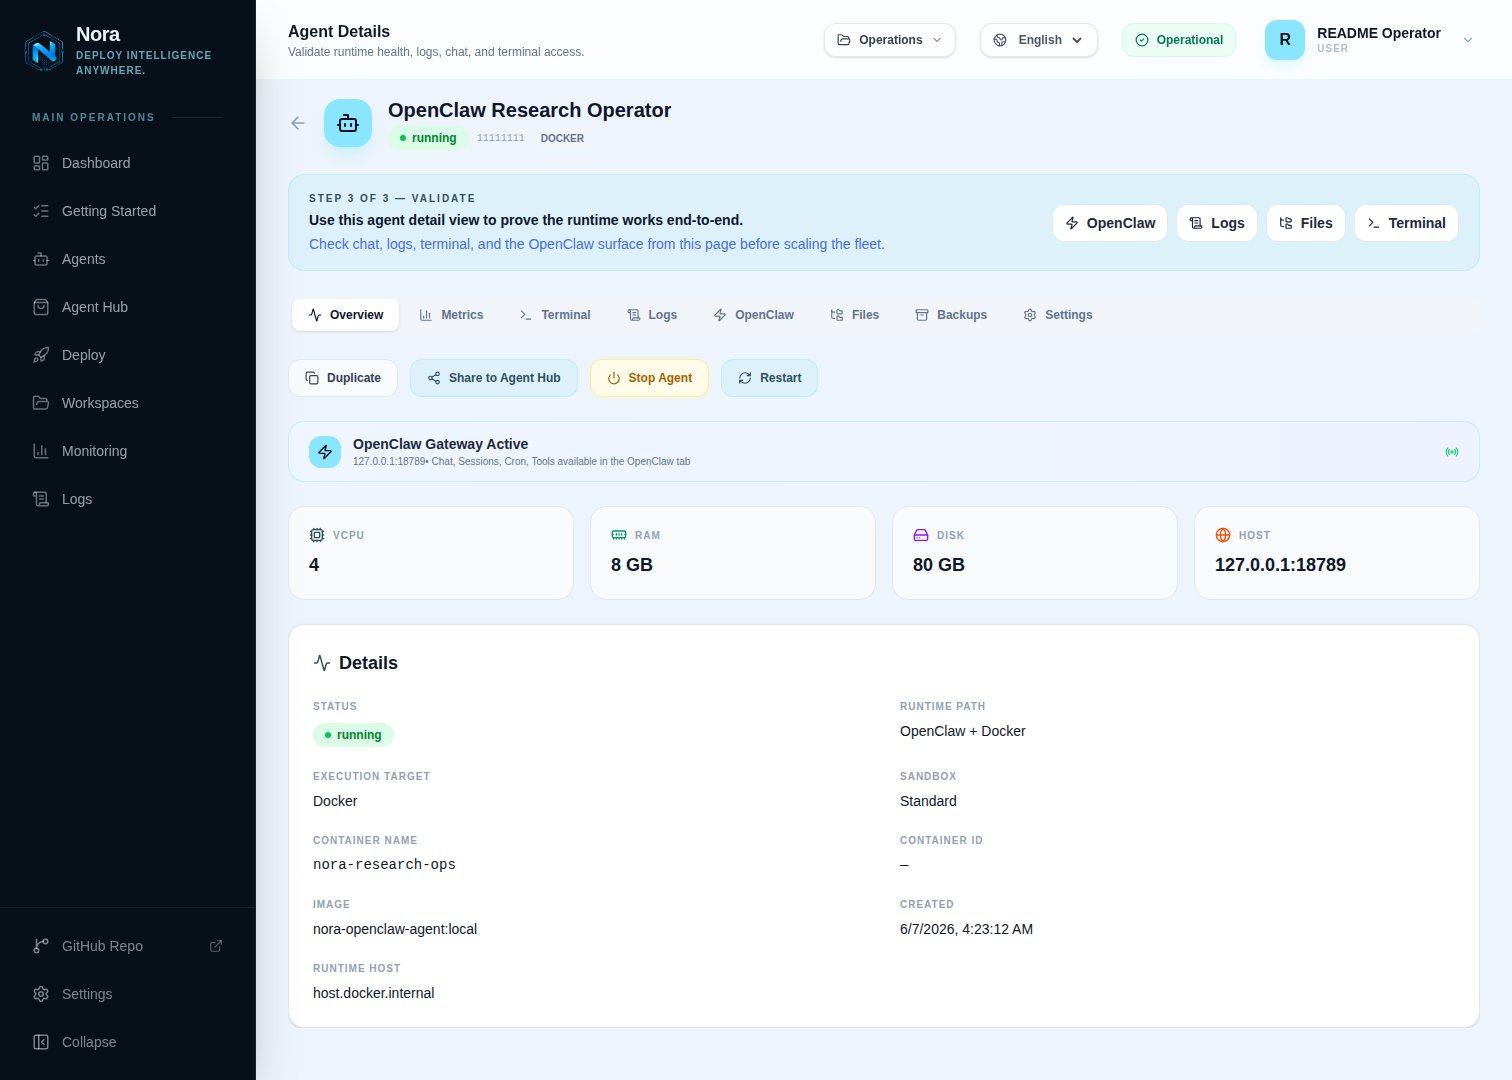
- Confirm the agent shows a running status
- Click Sync Keys if you need to push your provider keys to the running runtime
- Open Chat and send a test message to confirm the LLM connection is working
- Click Logs and inspect the output to confirm the runtime is healthy
- Open Terminal to confirm you have an interactive session
What’s next
Deploy an agent
Learn how to configure runtimes, resource limits, and deployment options in depth.
Manage LLM providers
Add more providers, rotate keys, and control which agents have access to each key.
Connect integrations
Wire GitHub, Slack, Jira, AWS, and other tools to your running agents.
Monitor operations
Track agent health, LLM usage, costs, and runtime activity in real time.