Publish and install Agent Hub templates
Convert an existing agent into a reusable Agent Hub listing, optionally share it to the community catalog, and install listings into any workspace with one click.Agent Hub turns a working agent into a reusable template. This guide covers the end-to-end flow: install a listing, publish your own, share to the community catalog, and roll out a new version.
What Agent Hub does
Agent Hub is the catalog of ready-to-run agent templates inside Nora. Instead of configuring an agent from scratch — runtime, image, environment, files, and integrations — you install a listing that captures all of it, and Nora materializes a working agent in one click. But the templates are only half the point. Agent Hub is a shareable hub, not just a static template store. Once an operator gets an agent working, they can publish it as a listing and share it — and that sharing works at three different reach levels:- Reuse it yourself — publish privately so anyone in your own workspace(s) can install the same agent with one click.
- Share with the community — push the listing to the public upstream hub (
https://nora.solomontsao.com), where, once approved, it appears in every Nora instance’s Community filter. - Run your own company hub — self-hosters can point
NORA_AGENT_HUB_URLat their own Agent Hub instead of the public one. Then “community” sharing stays entirely inside the company: every operator publishes to and installs from a private, org-internal catalog — the same reusable, shareable workflow, without anything leaving your infrastructure.
- Runtime configuration — runtime family (OpenClaw or Hermes), deploy target (Docker or Kubernetes today; Proxmox is planned), sandbox profile, and the default container image.
- Workspace files — the markdown that defines the agent’s behavior: identity, operating rules, scheduled tasks, and any bootstrap script that runs on first message.
- Integration wiring — which providers the agent expects, so you know what to connect after install.
- Built-in — platform-seeded templates that ship with Nora (for example, the Echo personal-branding agent).
- Internal — listings your workspace has published for its own reuse.
- Community — listings synced from the upstream hub and approved for everyone.
Example: install and set up Echo
The fastest way to see the full flow is to install a built-in template and configure it end to end.Set up Echo, the personal-branding agent
A worked example: install the Echo listing, connect X and/or LinkedIn in the Integrations tab,
connect a channel (WhatsApp) in the Channels tab, and run the bootstrap that learns your voice.
Install a listing
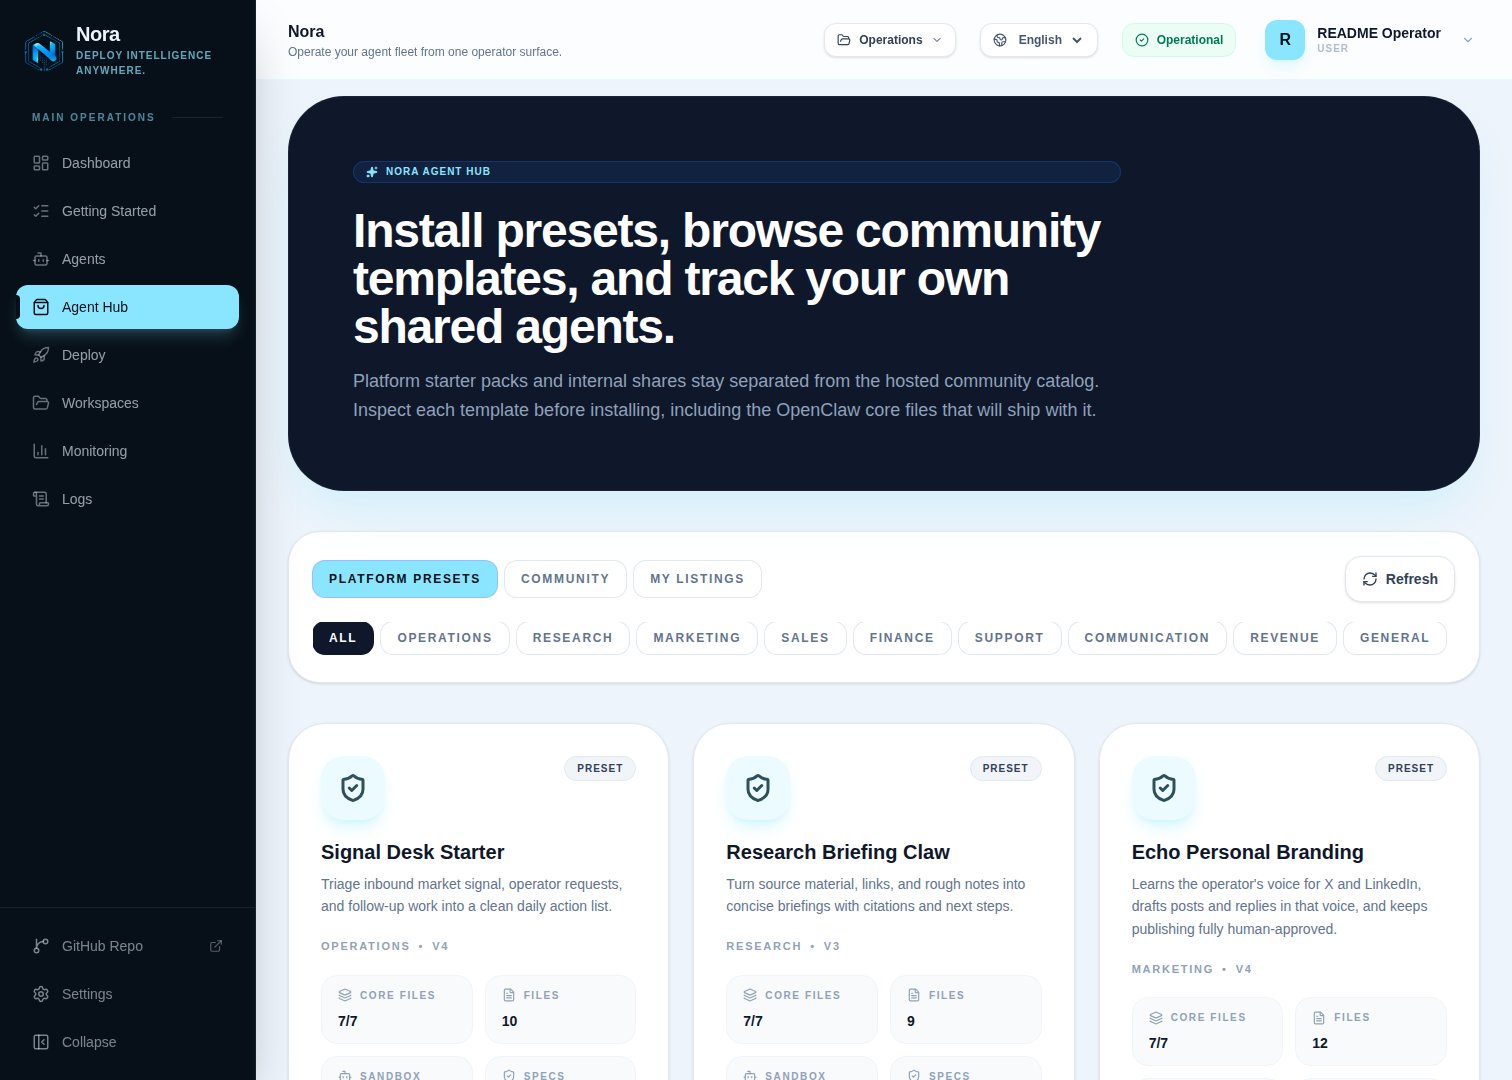
Open Agent Hub
From the dashboard, open Agent Hub in the workspace navigation. The catalog shows three filters: Internal (your workspace’s listings), Community (synced from the upstream hub), and Built-in (platform-seeded templates).
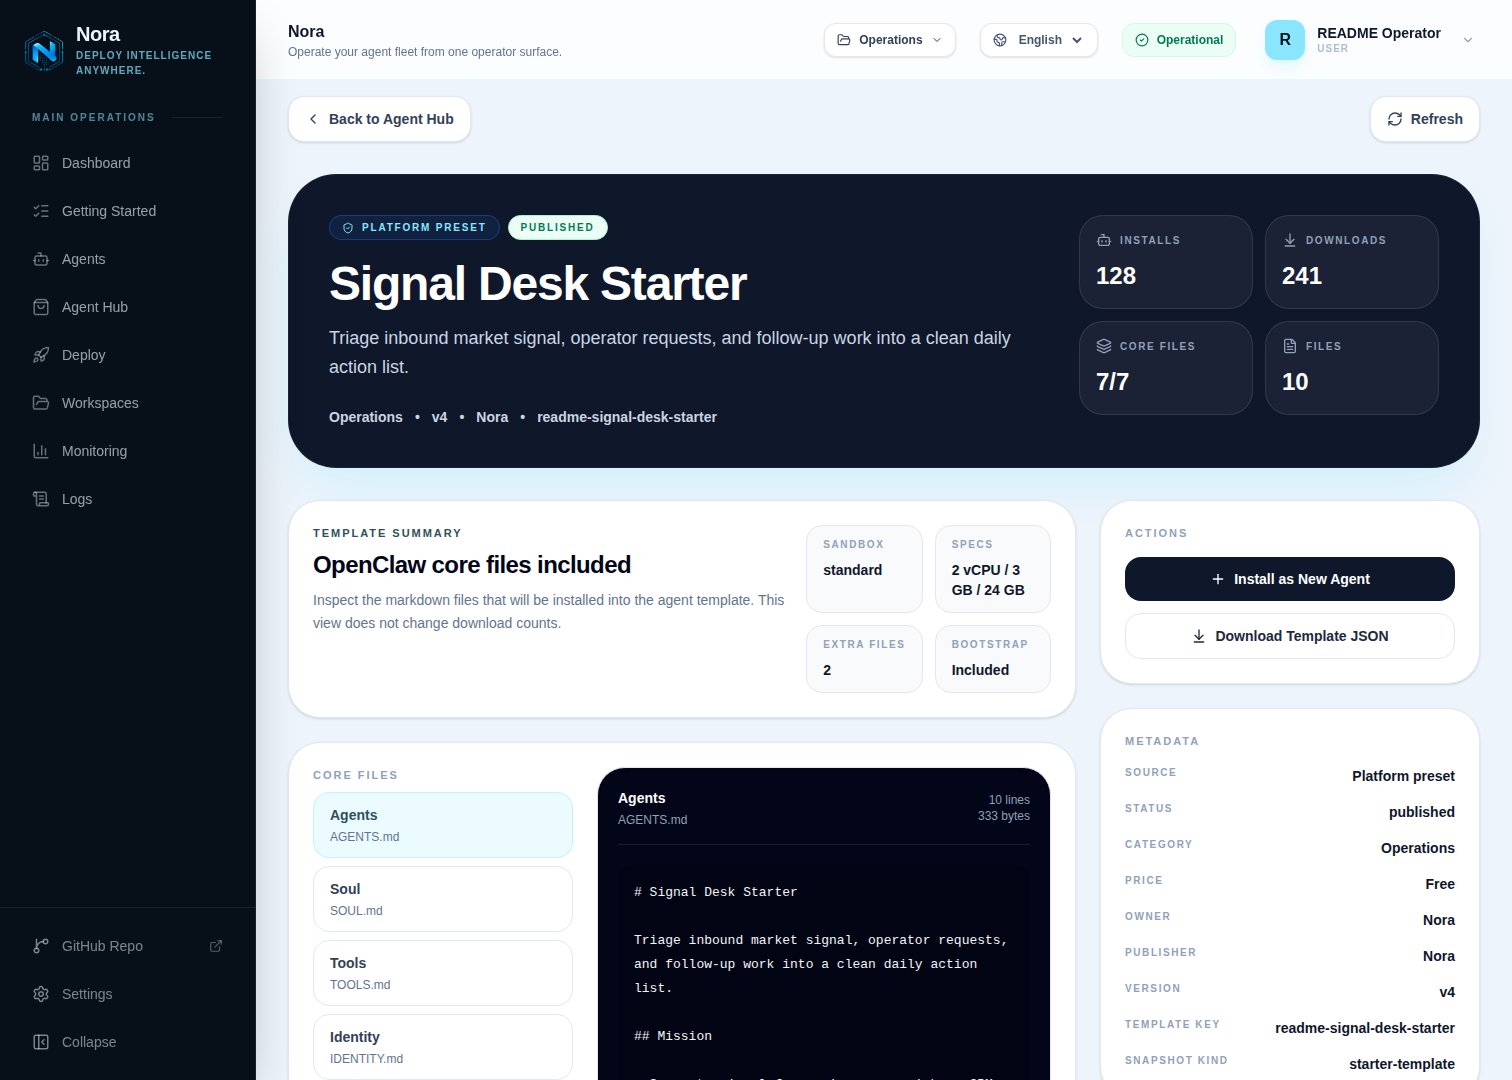
Select a listing
Click any listing to open its detail page. You’ll see the runtime family, deploy target, sandbox
profile, default image, and any bootstrap files or integrations the template wires up.
Publish a workspace listing
Pick a working agent
Open the agent detail page for the agent you want to template. Make sure it’s healthy — the listing snapshot reflects the agent’s current image, env, files, and integrations.
Click Publish to Agent Hub
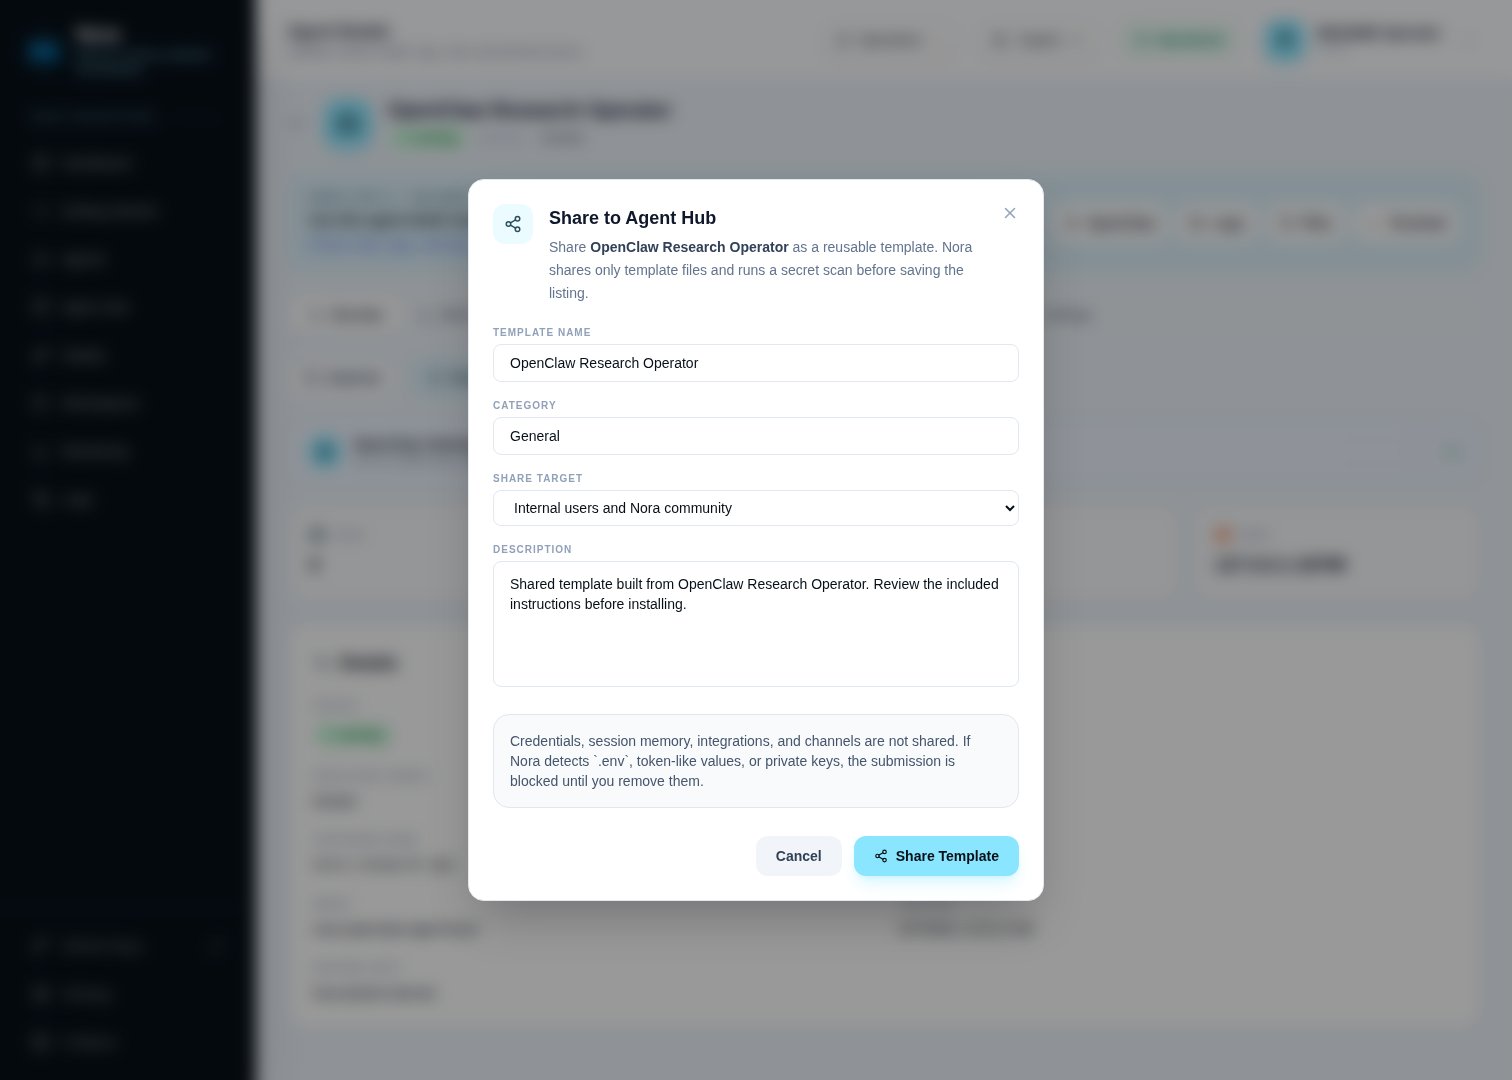
- Name — display name for the listing.
- Description — short description shown in the catalog.
- Category — free-form label used for filtering.
- Share target —
internal(your workspace only),community(push to the upstream hub), orboth.
Roll out a new version
When the source agent’s image, env, or files change, you can capture a new version on top of the existing listing instead of publishing a fresh one.- Open the listing detail page.
- Click Capture new version.
- Choose
files_only(recommended) orimage_and_files. - Confirm.
Share to the community catalog
Workspace listings published with share targetcommunity or both sync to the upstream Agent Hub at NORA_AGENT_HUB_URL (default https://nora.solomontsao.com). The flow:
- Listing is created locally with
centralShareStatus = pending. - Nora pushes the listing payload to the upstream hub using the workspace’s source-catalog API key.
- Upstream reviewers approve, request changes, or reject. The result is mirrored to
centralShareStatus. - Approved listings appear in every workspace’s Community filter.
centralError shows the cause and the listing stays in pending. Click Retry sync from the listing detail page to push again.
Manage source-catalog keys
- Keys are stored hashed using
NORA_AGENT_HUB_API_KEY_HASH_SECRET. Rotating the secret invalidates every issued key. - Each key has a label, status (
active/revoked), and a 6-character prefix shown in the UI. - Self-hosters can either use the upstream community hub or run their own and point
NORA_AGENT_HUB_URLat it.
Permissions
| Capability | Required role |
|---|---|
| Browse listings | viewer |
| Install a listing | editor |
| Publish, edit, unpublish listing | admin |
| Manage source-catalog API keys | admin |
Troubleshooting
Install fails immediately
Install fails immediately
Check the agent detail page for the new agent — the deploy job’s
failedReason shows up there. Common causes: the destination workspace lacks the runtime family, deploy target, or sandbox profile the listing requires.Community sync stays in pending
Community sync stays in pending
Open the listing detail page and check
centralError. If it mentions auth, regenerate the
source-catalog API key. If it mentions validation, the upstream hub rejected the payload — usually
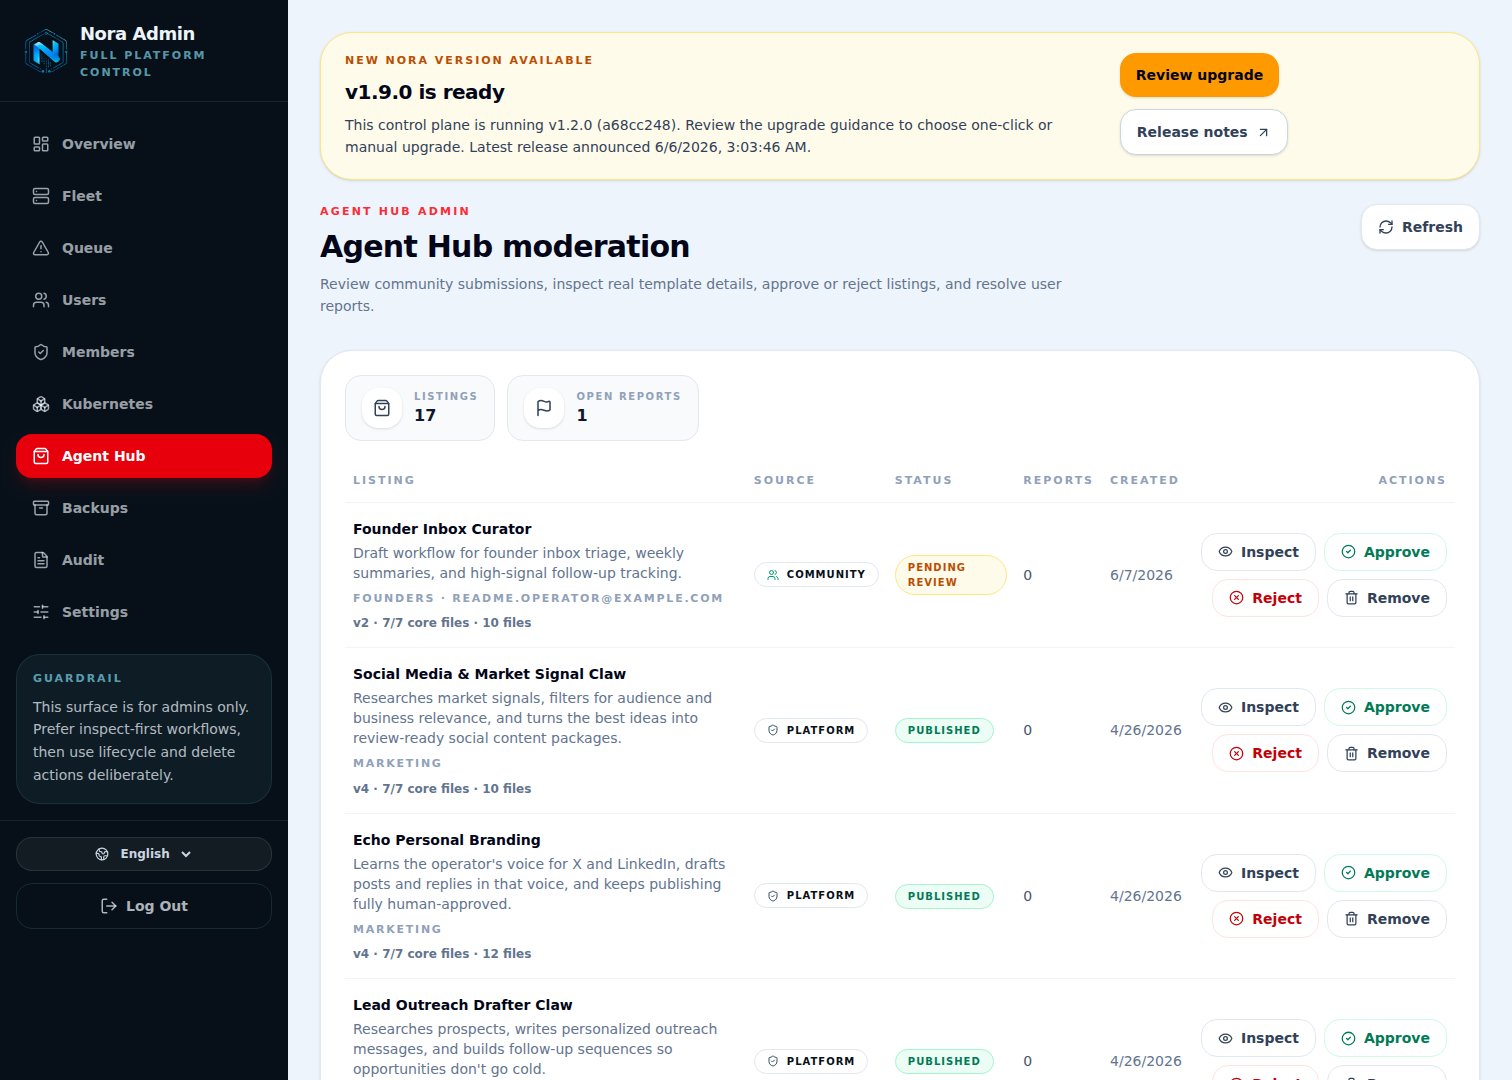
for a missing description or an unsupported runtime ID.Reports aren't visible to me
Reports aren't visible to me
Reports are reviewed in the upstream hub. The publishing workspace sees the report’s resolution mirrored back; reporters see their own report status under Settings → My reports.